Build brand awareness and reach your guests by setting up email authentication for your custom domain.
You may access the configuration page from Settings:
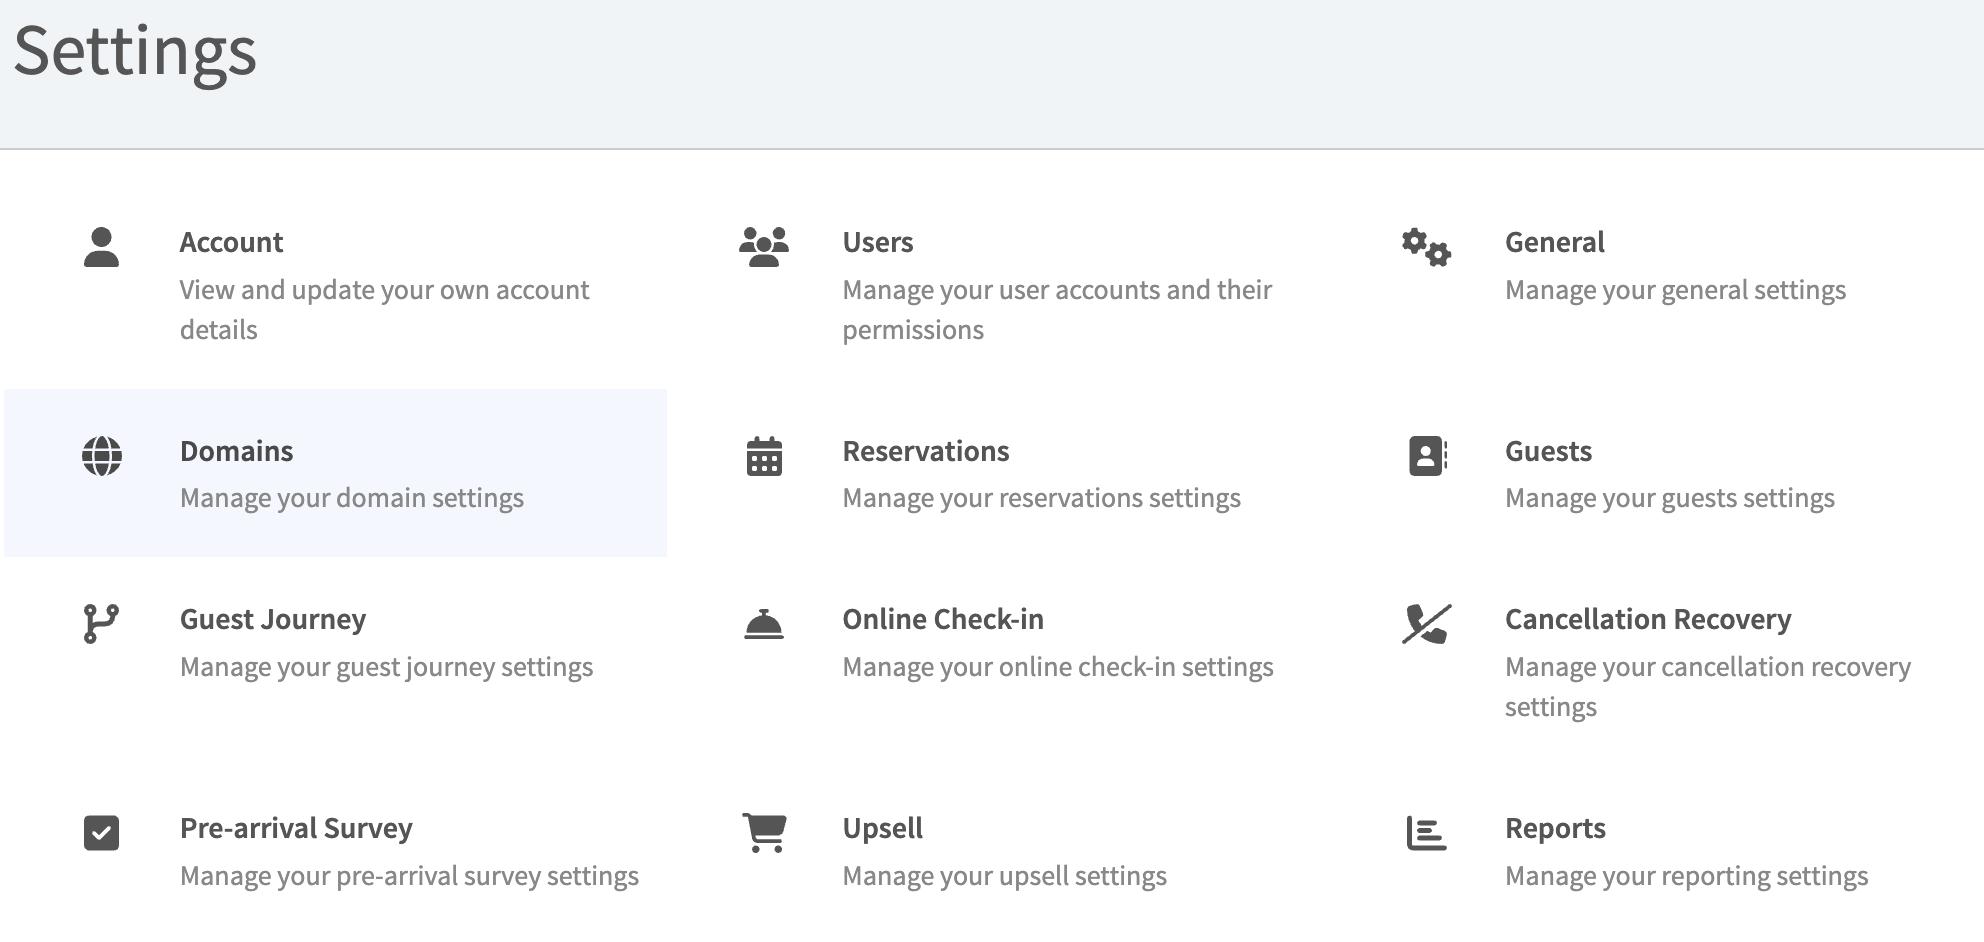
Or from this URL: https://prism.gokai.co/settings/domains
If you are unable to access it, please contact our representative.
1. Add Custom Email Domain
Please ensure that the email domain is valid. For instance, yourhotel.com (without www in front).
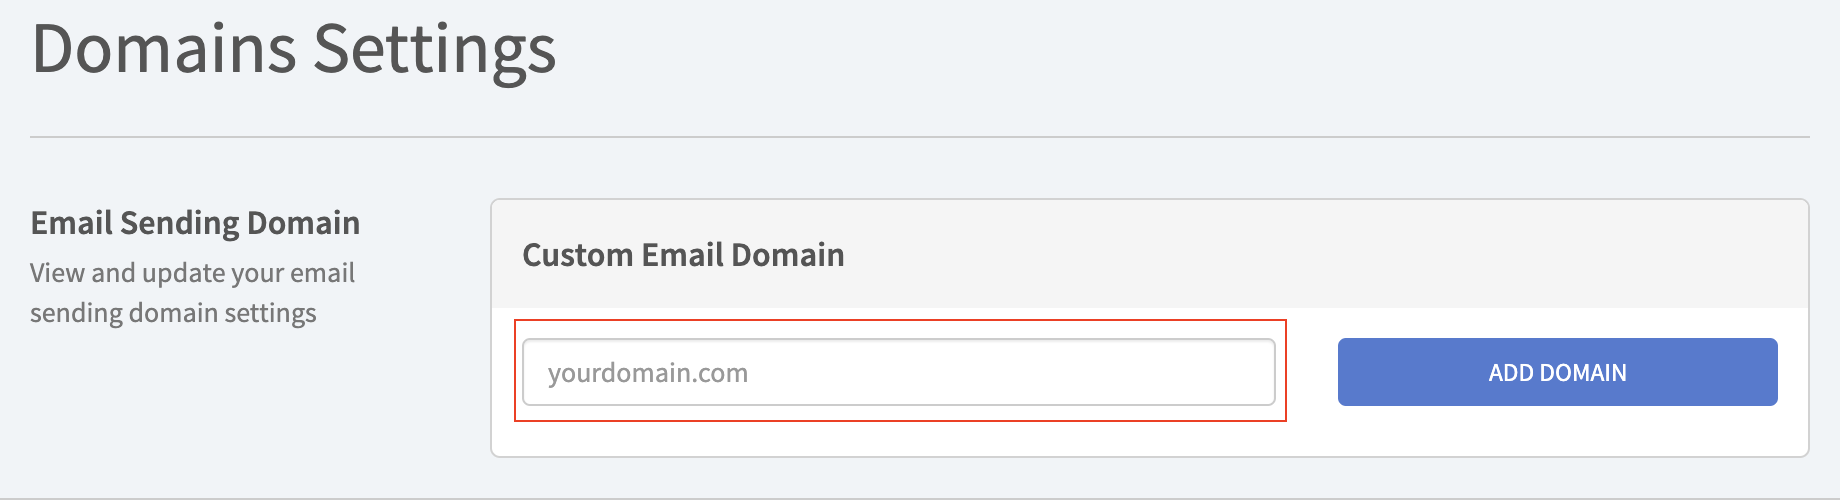
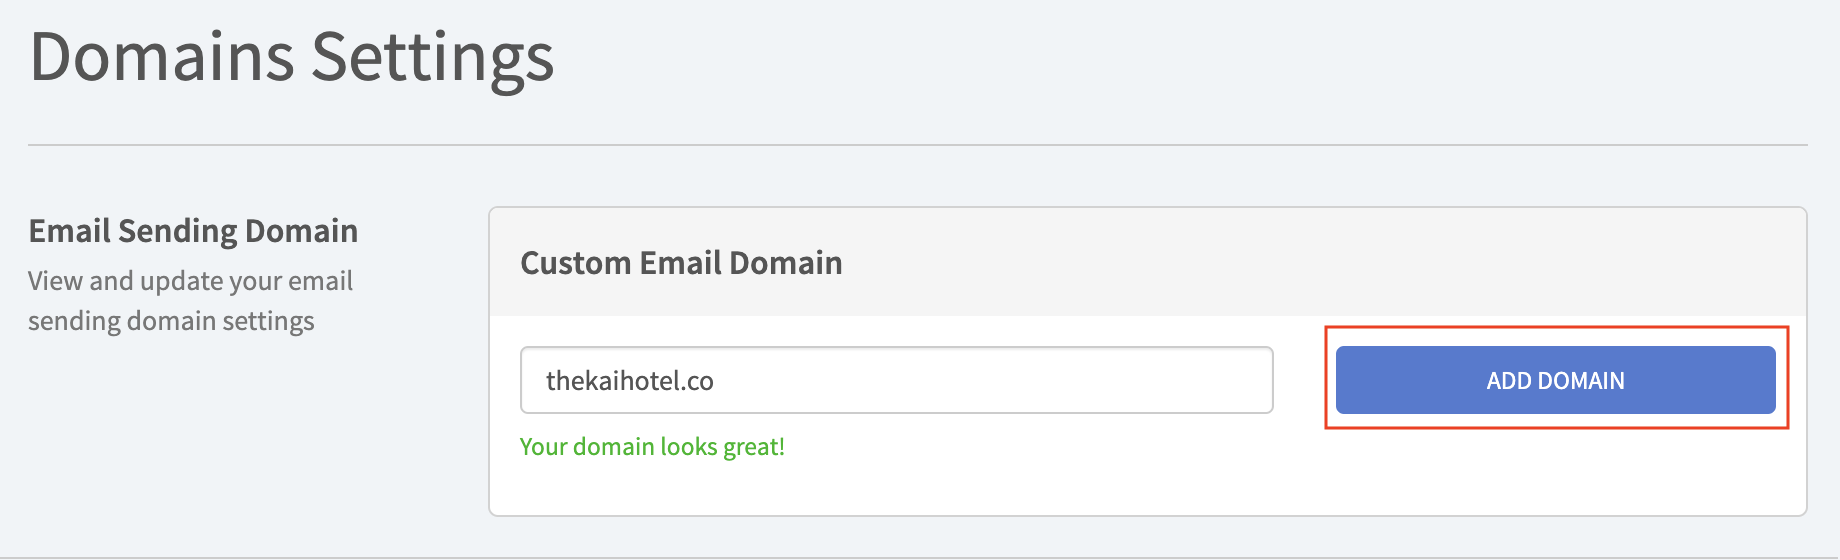
If your domain is valid, you will see the below page, then click on ADD DOMAIN button:
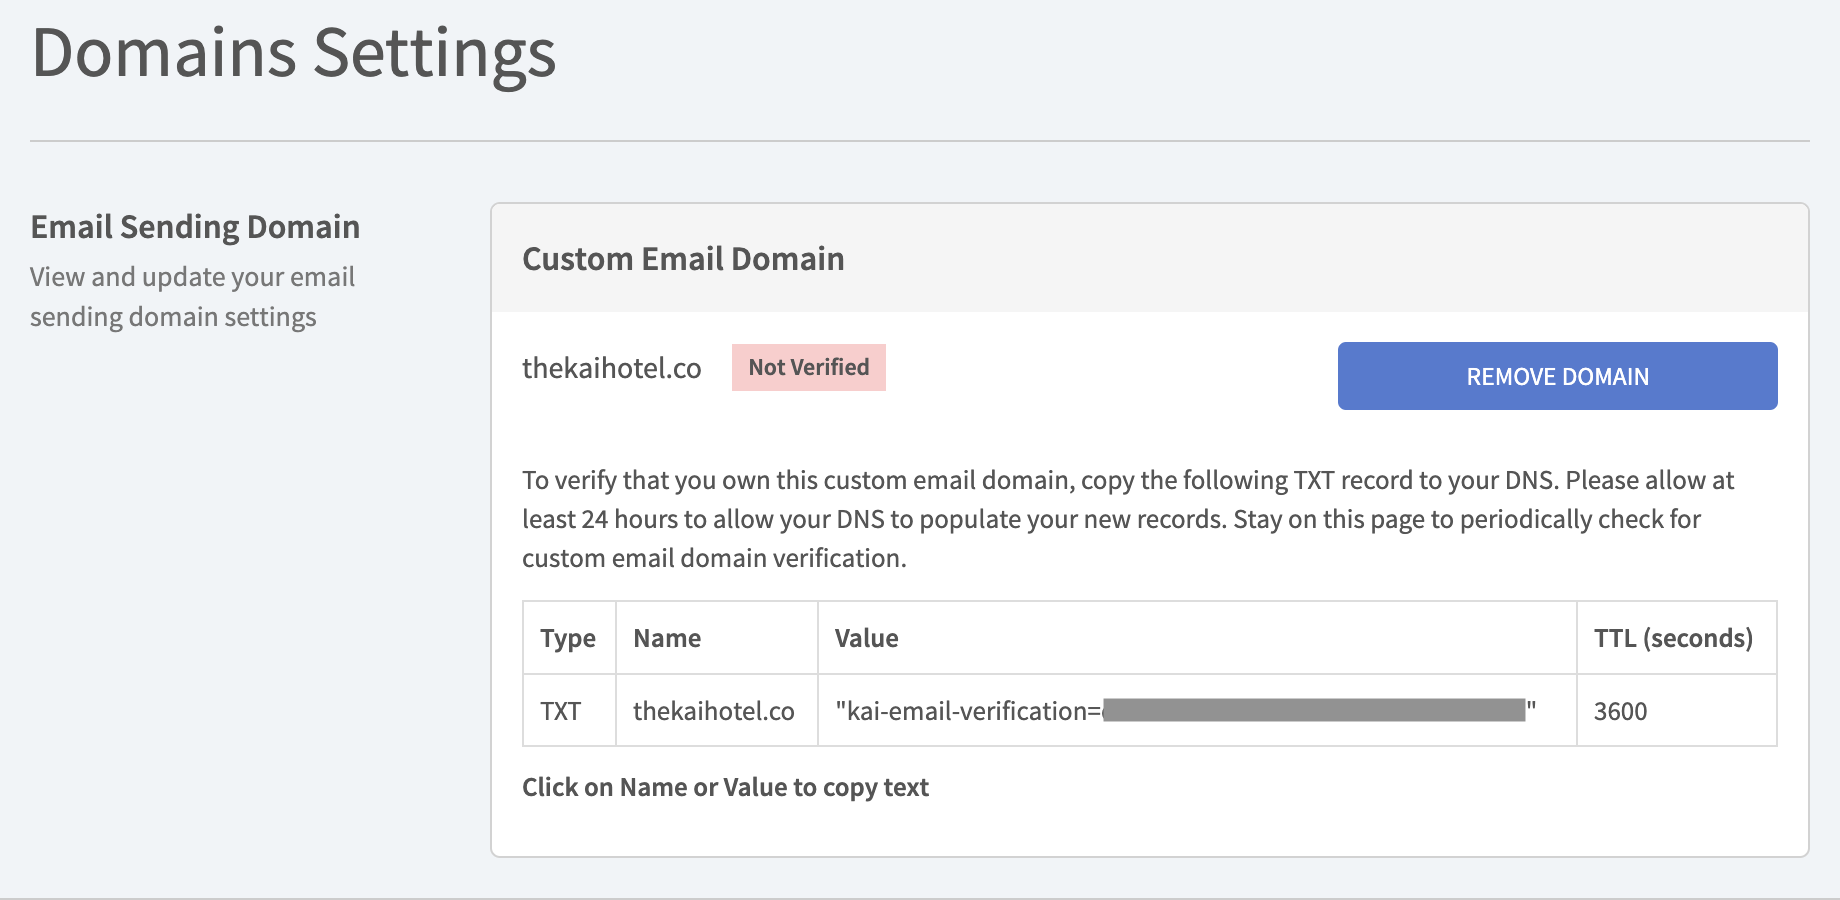
2. Verify Custom Email Domain
Once the custom domain has been added, the configuration page below will be displayed:
If you have questions about your DNS configuration, please refer to the instructions provided by your domain provider. Here are instructions for popular providers:
Amazon Web Services: Configuring DNS, Resource Record Types
Bluehost: Manage DNS Records
CPanel: DNS Zone Manager
Dreamhost: DNS Overview
GoDaddy: Add a CNAME Record
Google Domains: DNS Basics
Hostgator: Manage DNS records
Hover: Managing DNS records
IONOS: Configuring CNAME Records
Namecheap: SPF & DKIM Record
Siteground: Create CNAME Records
Squarespace: DNS Settings
Stablehost: How do I get to cpanel?
Wordpress: Manage Your DNS Records
Siteground: Manage CNAME Records
Please follow the instructions on the page and copy the TXT record to your DNS. Allow at least 24 hours for your DNS to populate the new records. Once verified, the page below will display:
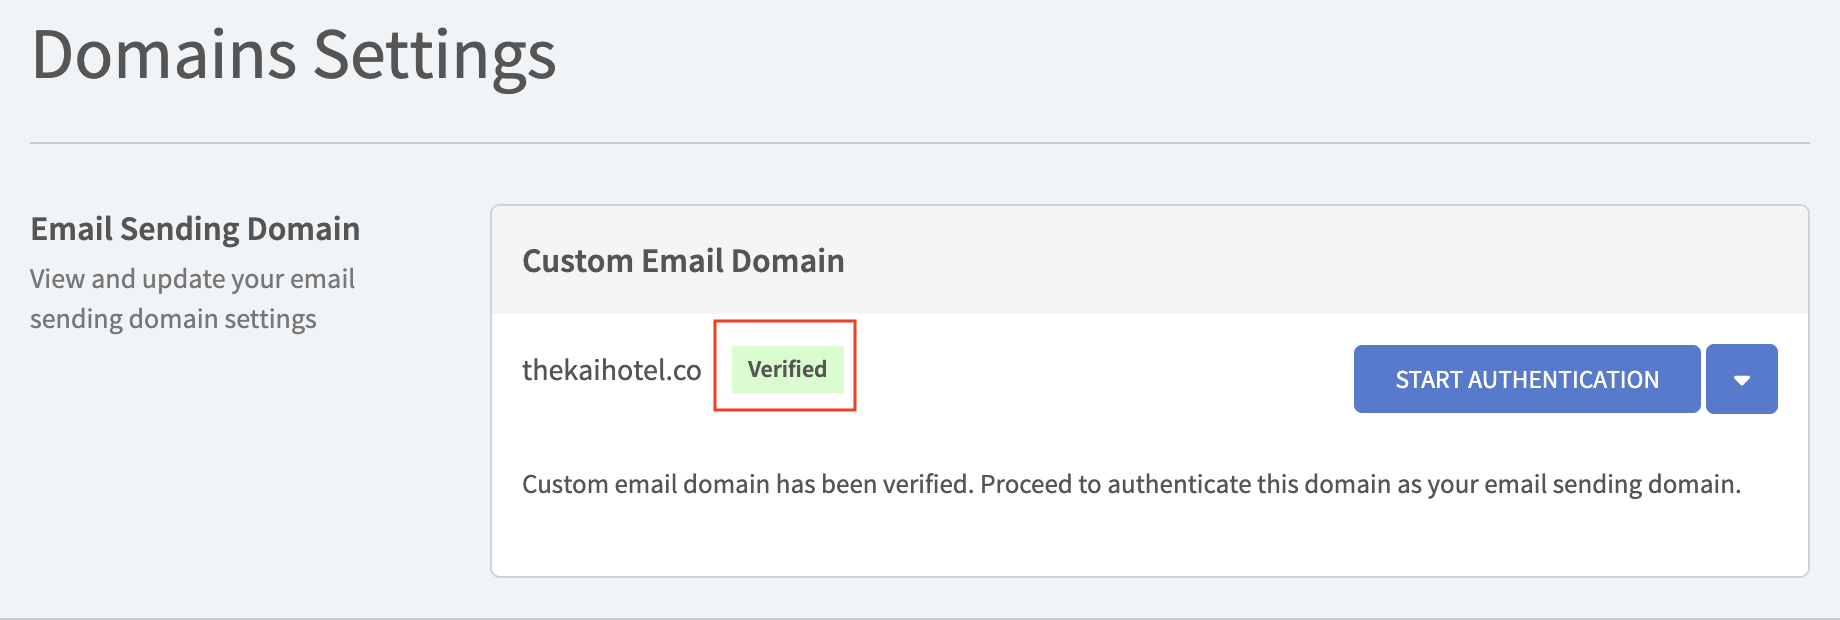
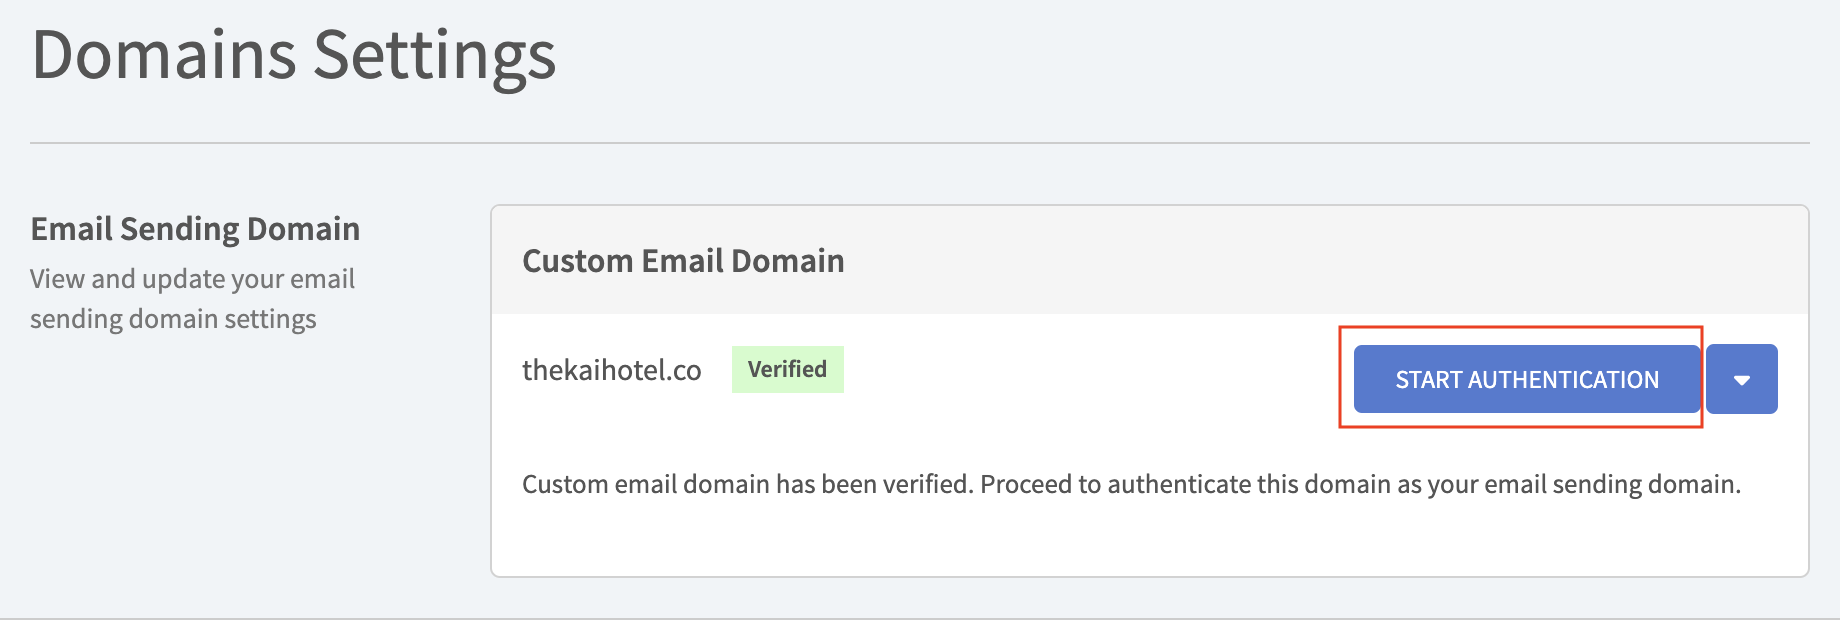
3. Authenticate Custom Email Domain
Now you can authenticate your custom email domain by clicking on the "START AUTHENTICATION" button.
Please follow the instructions on the page and copy the CNAME records to your DNS. Allow at least 72 hours for your DNS to populate the new records.
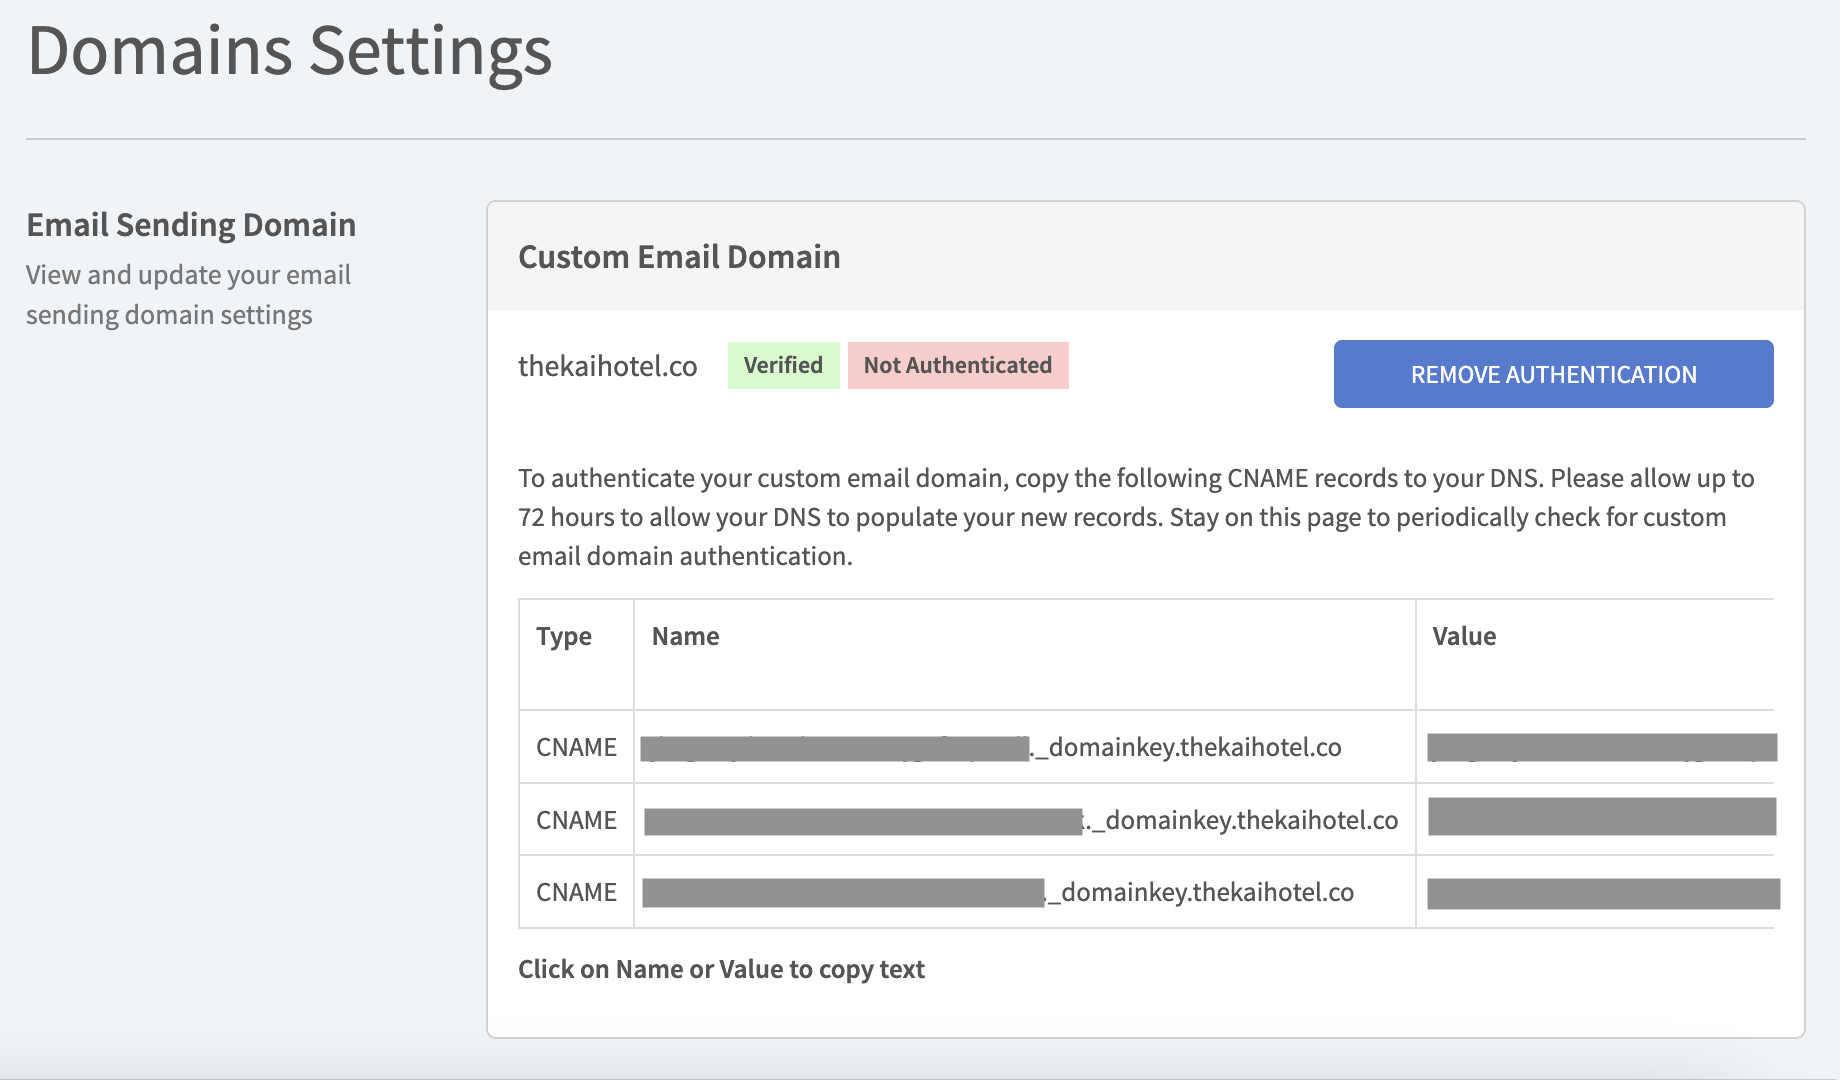
After it is populated, the page below will be shown:
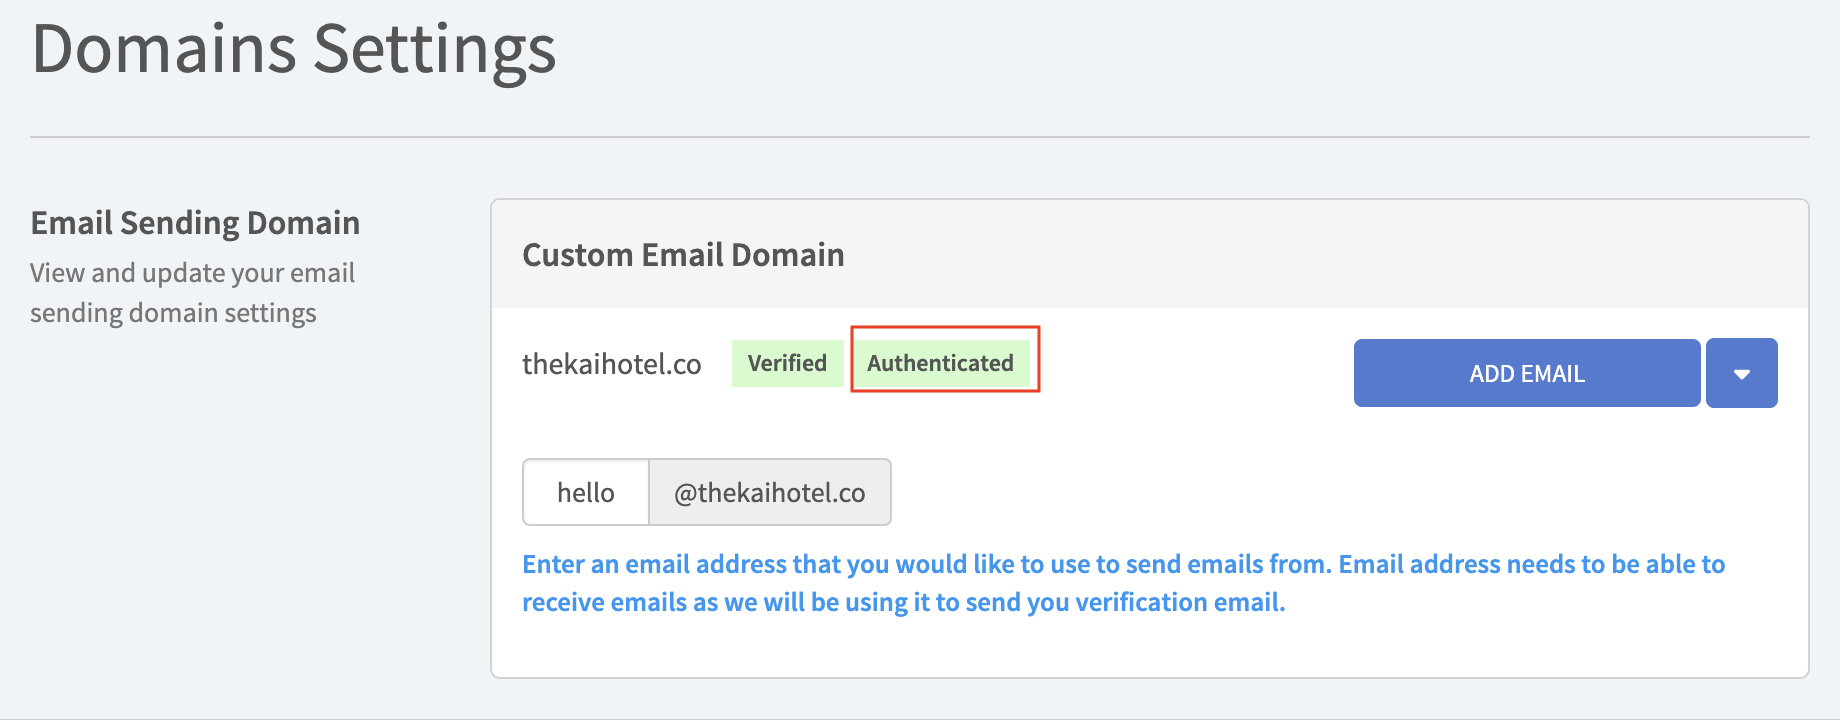
4. Add Email Address
Enter the email address you want to use for sending emails.
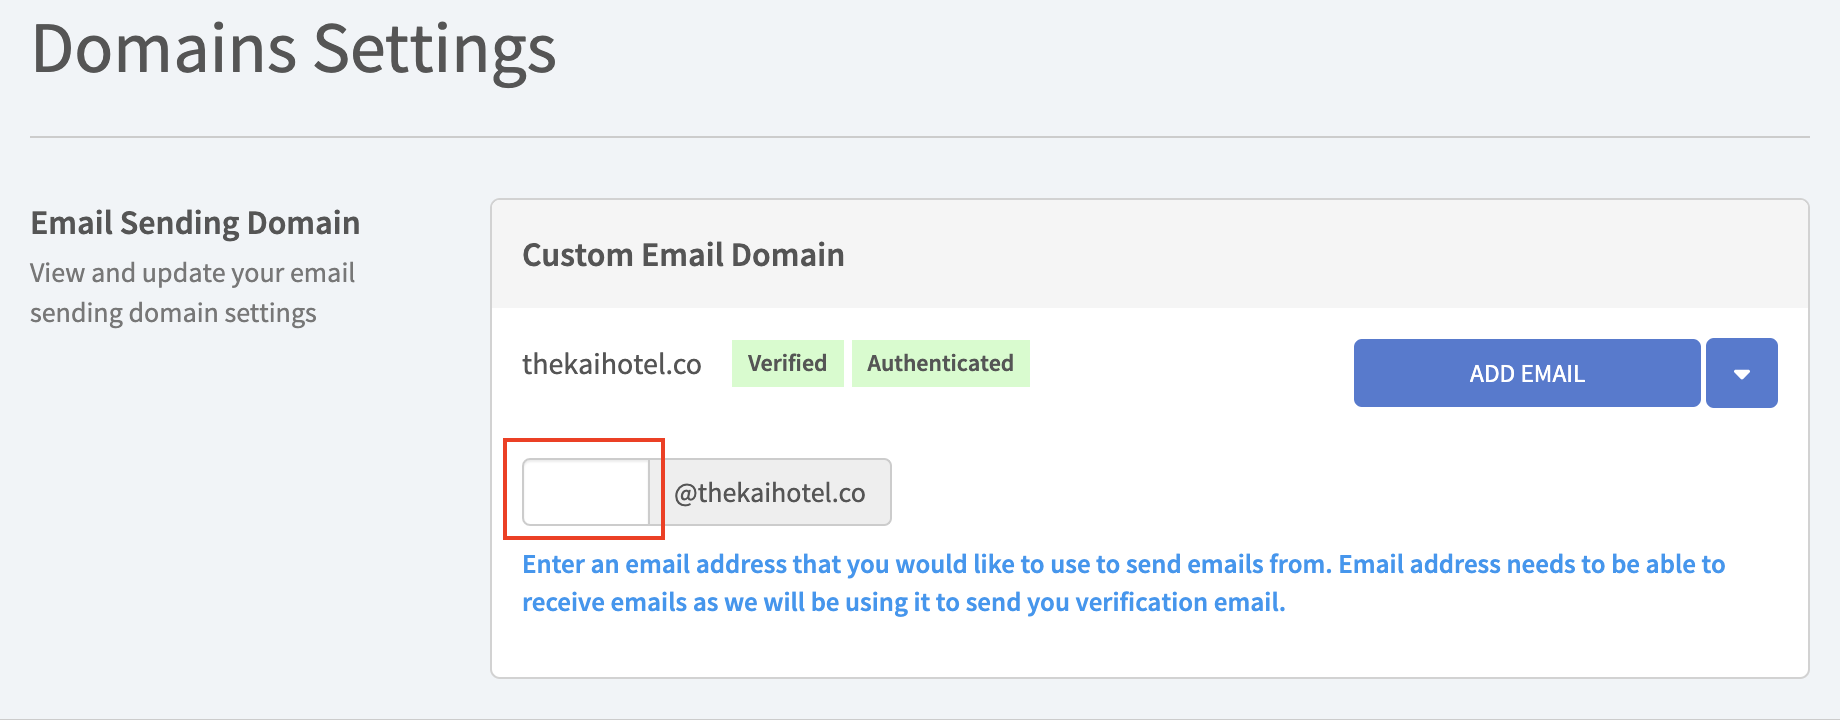
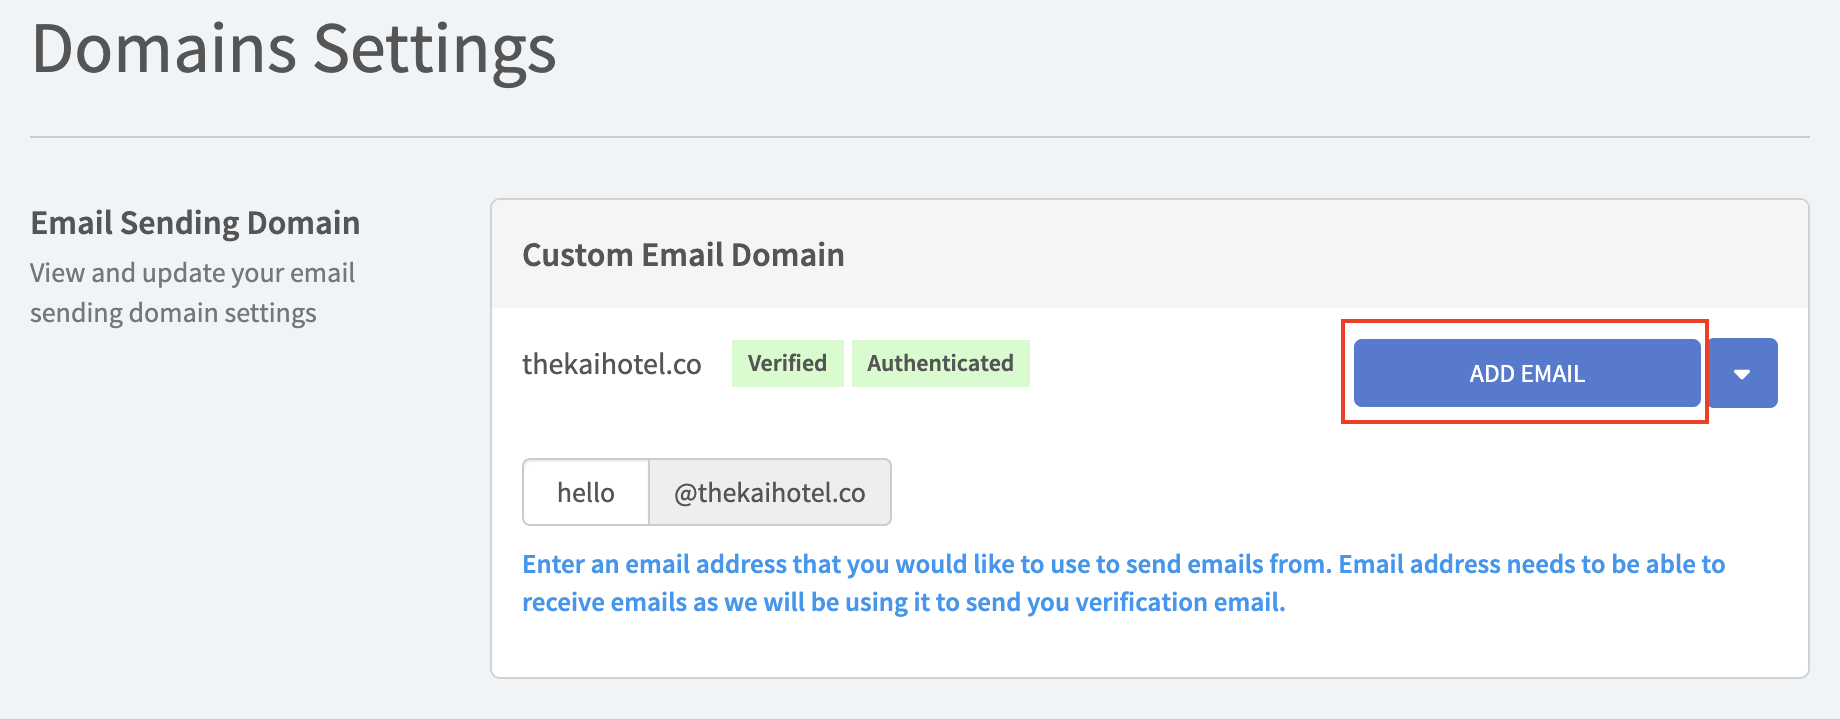
Please ensure the email address is valid before clicking on the "ADD EMAIL" button.
5. Verify the Email Address
After adding the email address, the below page will be displayed and a verification email will be sent to the email address you added.
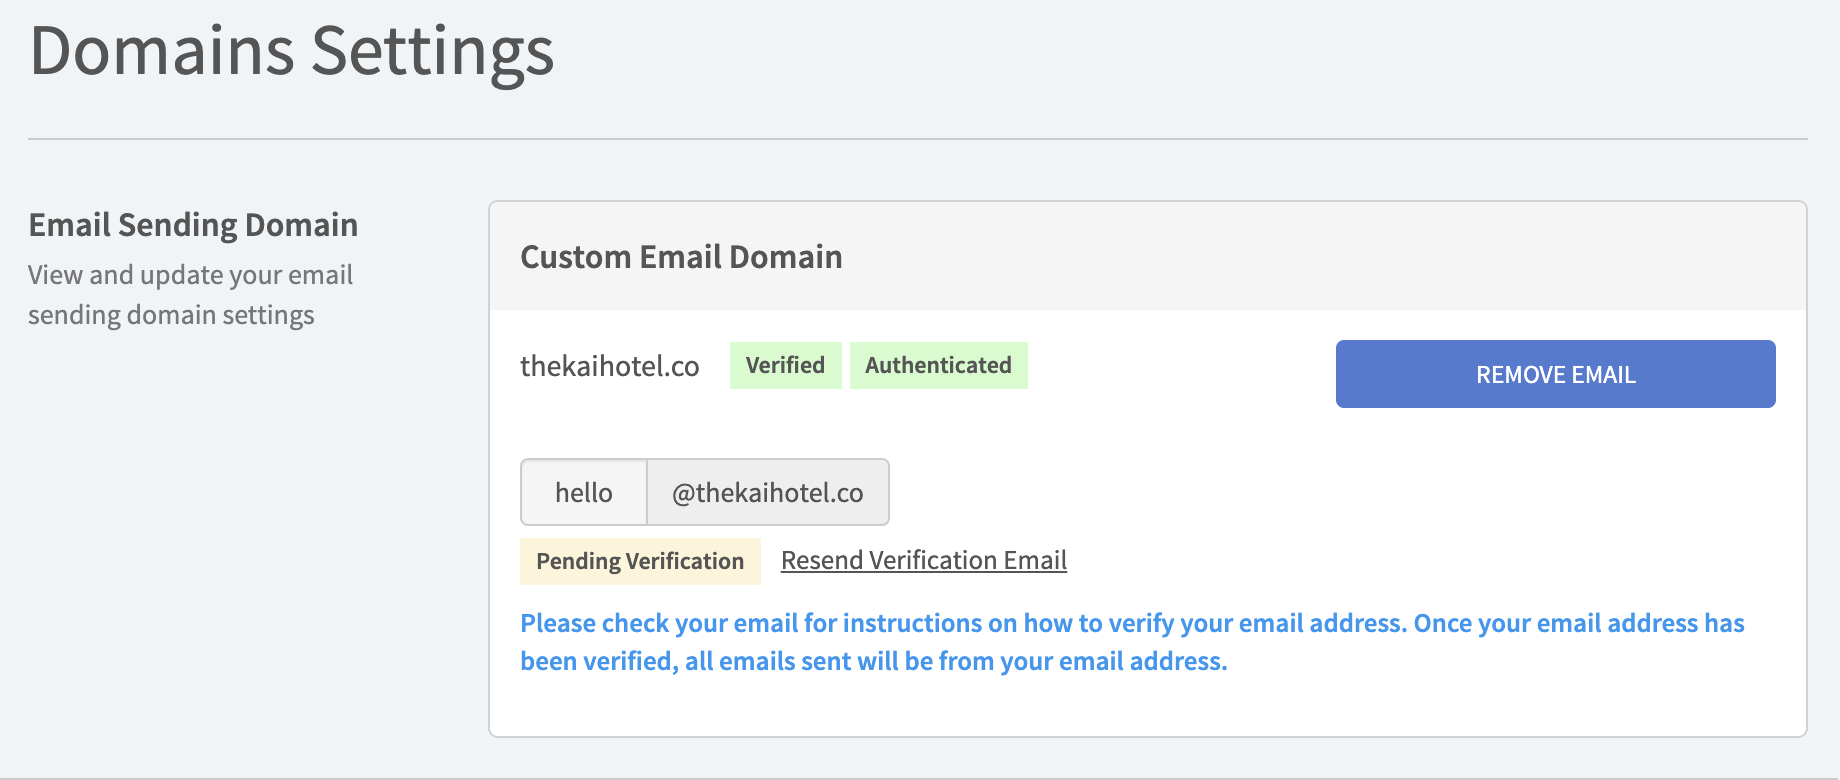
Please proceed to verify the email address:

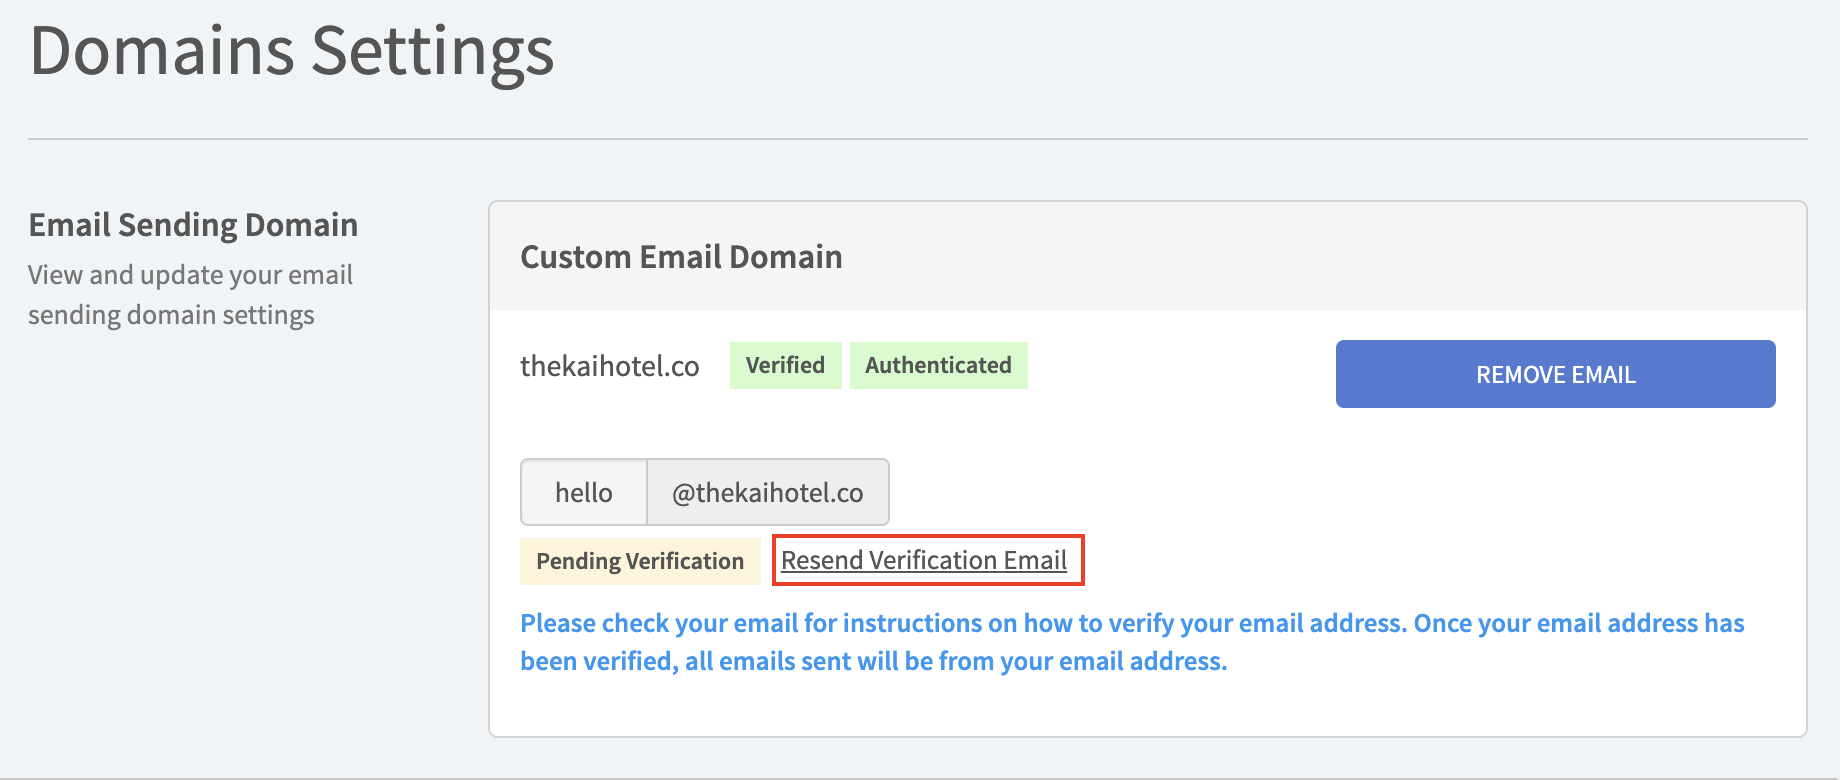
Please check your junk mail if you did not receive the verification email or click on "Resend Verification Email."
Once you verify the email address, the below page will be displayed:
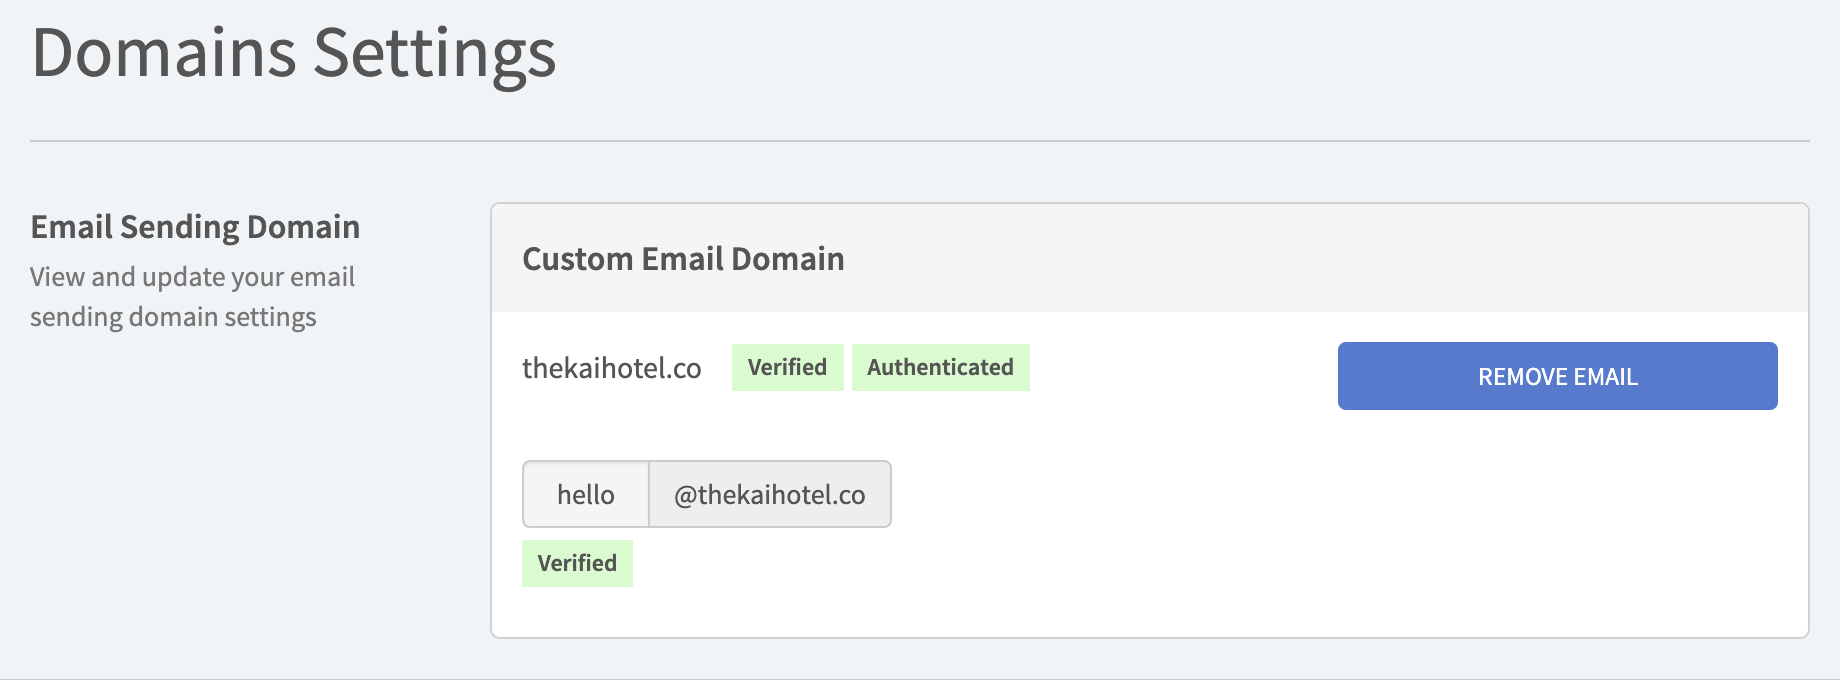
Congratulations, you have completed the custom email domain configurations. All Guest Journey Emails will now be sent from this email address.
If you have questions about your DNS configuration, please refer to the instructions provided by your domain provider. Here are instructions for popular providers:
Amazon Web Services: Configuring DNS, Resource Record Types
Bluehost: Manage DNS Records
CPanel: DNS Zone Manager
Dreamhost: DNS Overview
GoDaddy: Add a CNAME Record
Google Domains: DNS Basics
Hostgator: Manage DNS records
Hover: Managing DNS records
IONOS: Configuring CNAME Records
Namecheap: SPF & DKIM Record
Siteground: Create CNAME Records
Squarespace: DNS Settings
Stablehost: How do I get to cpanel?
Wordpress: Manage Your DNS Records
Siteground: Manage CNAME Records