On-premise Kiosk Self Check-in has become the new norm for hotel operation. Here is how to enable your own kiosk check-in.
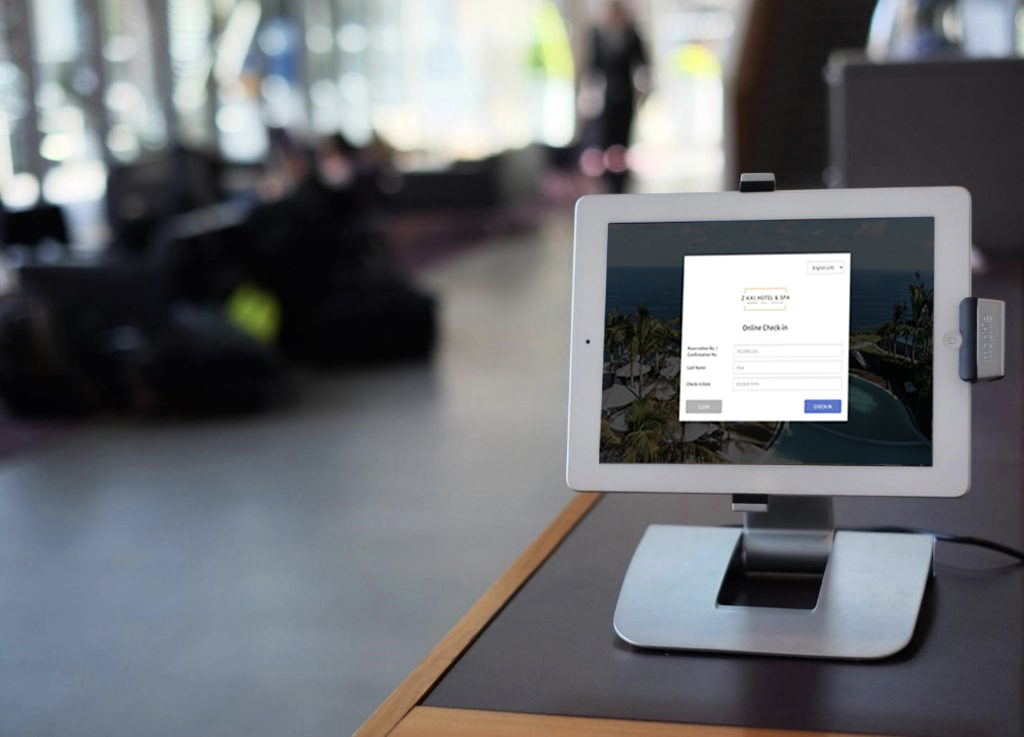
KAI provide a simple solution to allow your guests to complete the check-in with less physical contact at the hotel. The above photo is the example of the Self Check-in Kiosk in your hotel lobby.
If you haven't configured the Online Check-in Module, please read this article (Online Check-in Configuration) or contact us to enable it.
If you are using KAI Online Check-in, please follow the steps below to get the URL for Kiosk Check-in.
Contactless -> Online Check-in Configuration -> Online Check-in Preferences
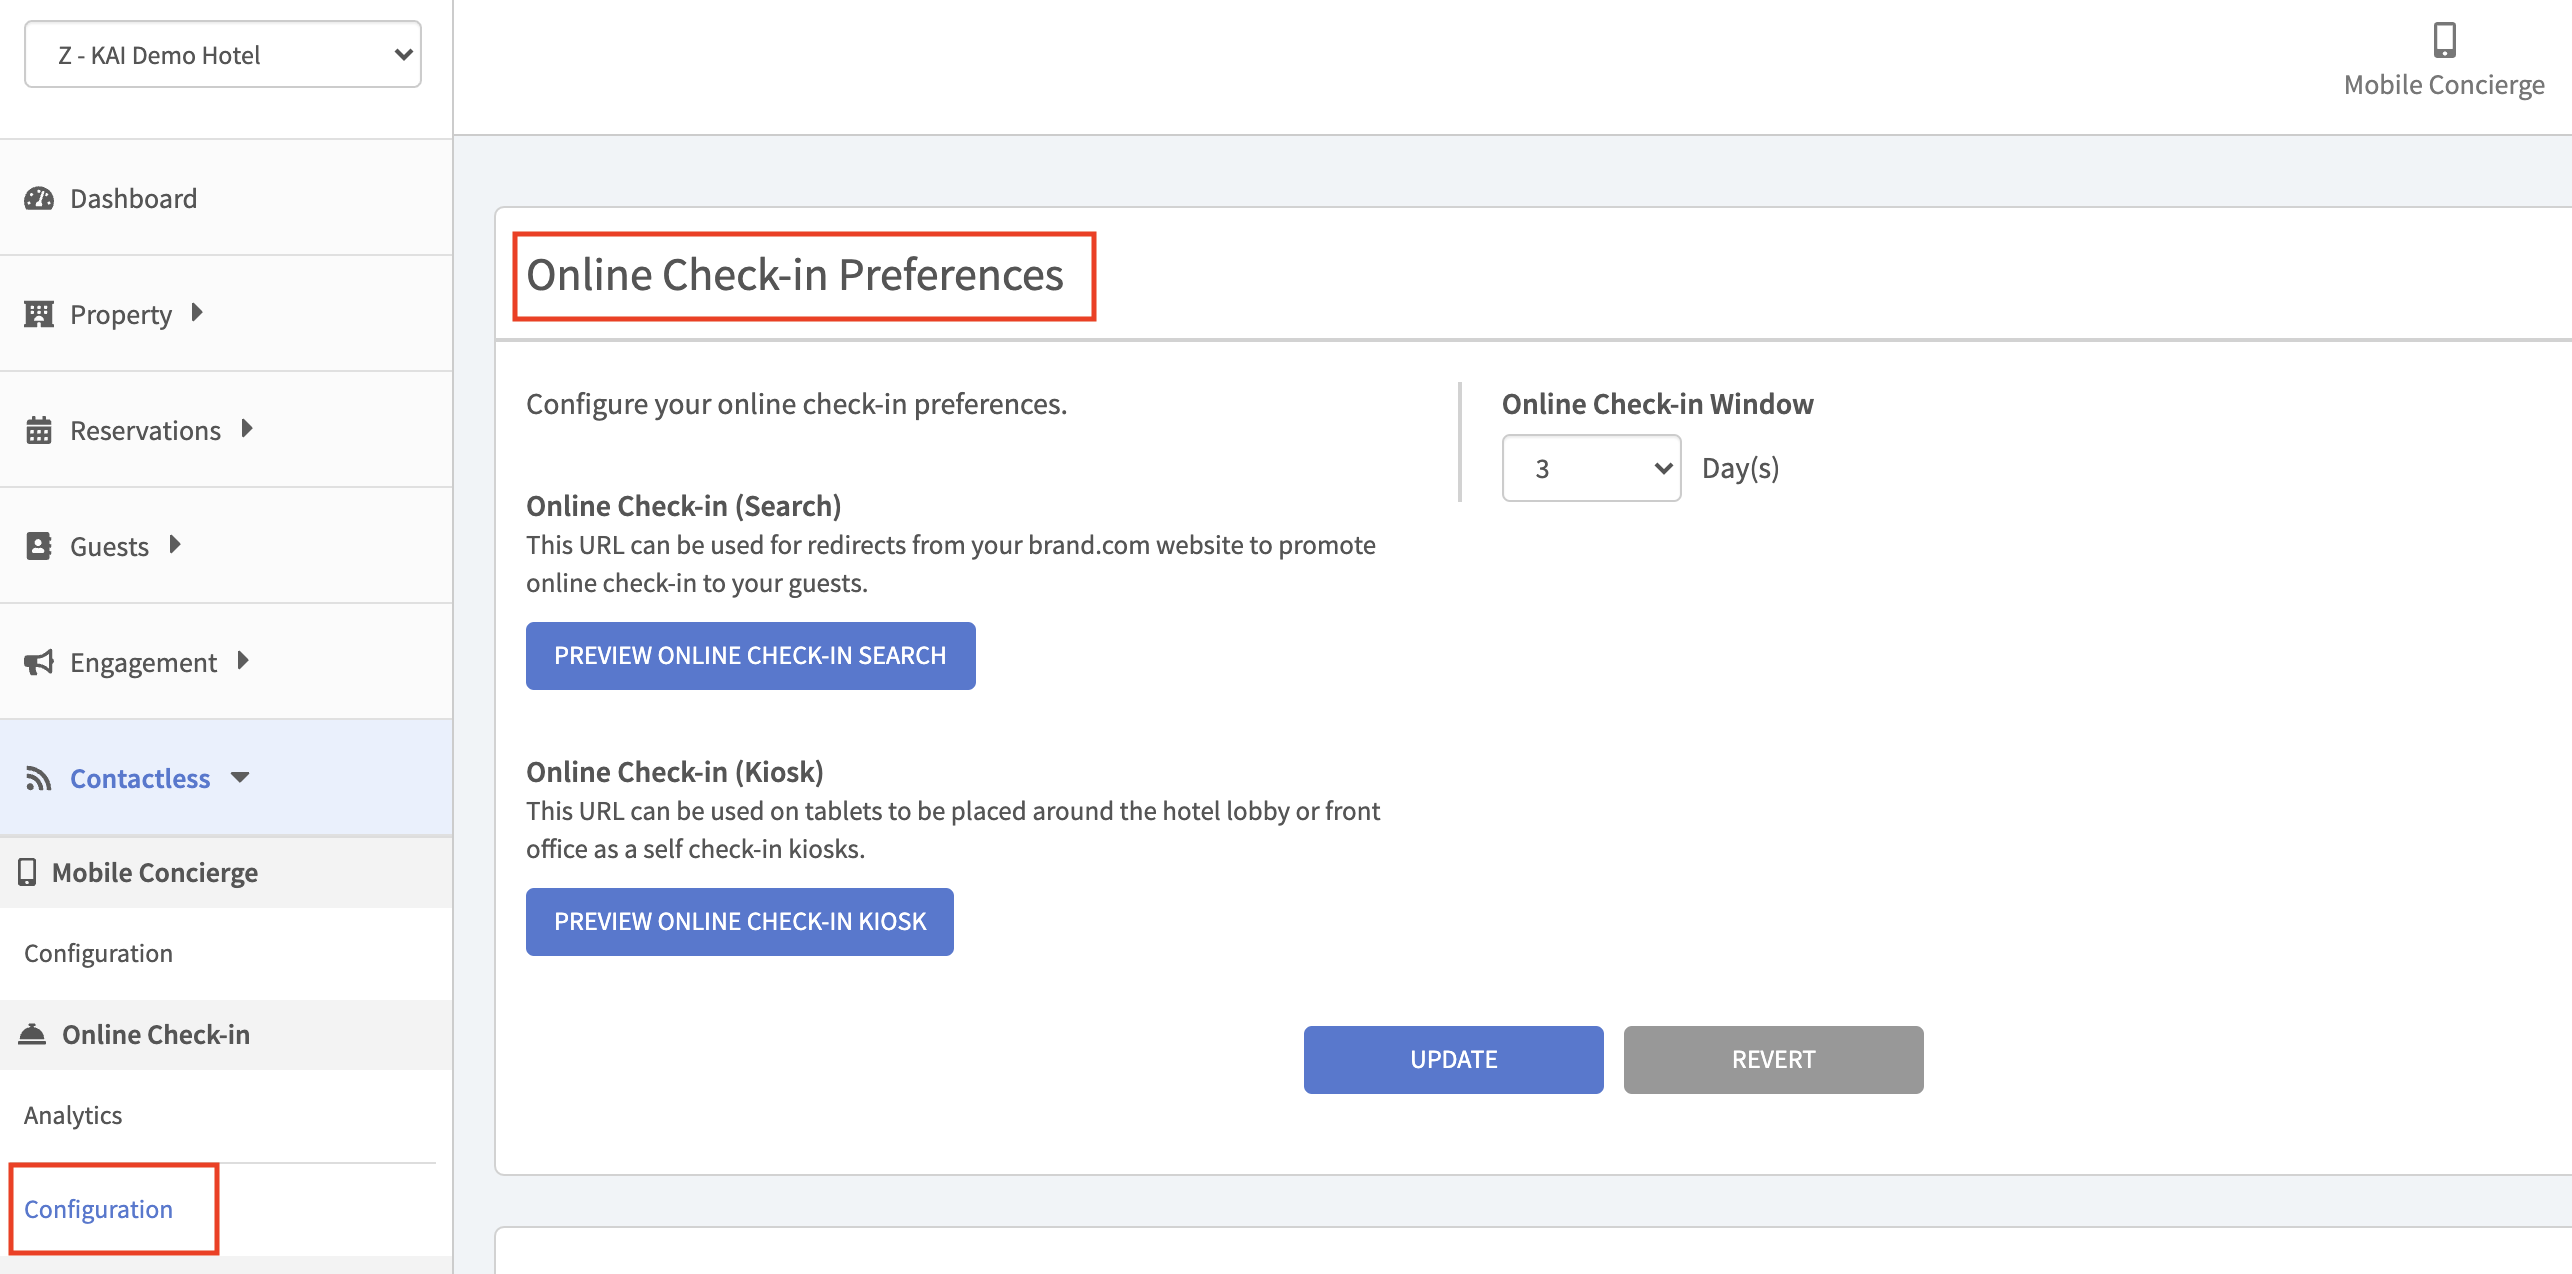
Find the above setting page.
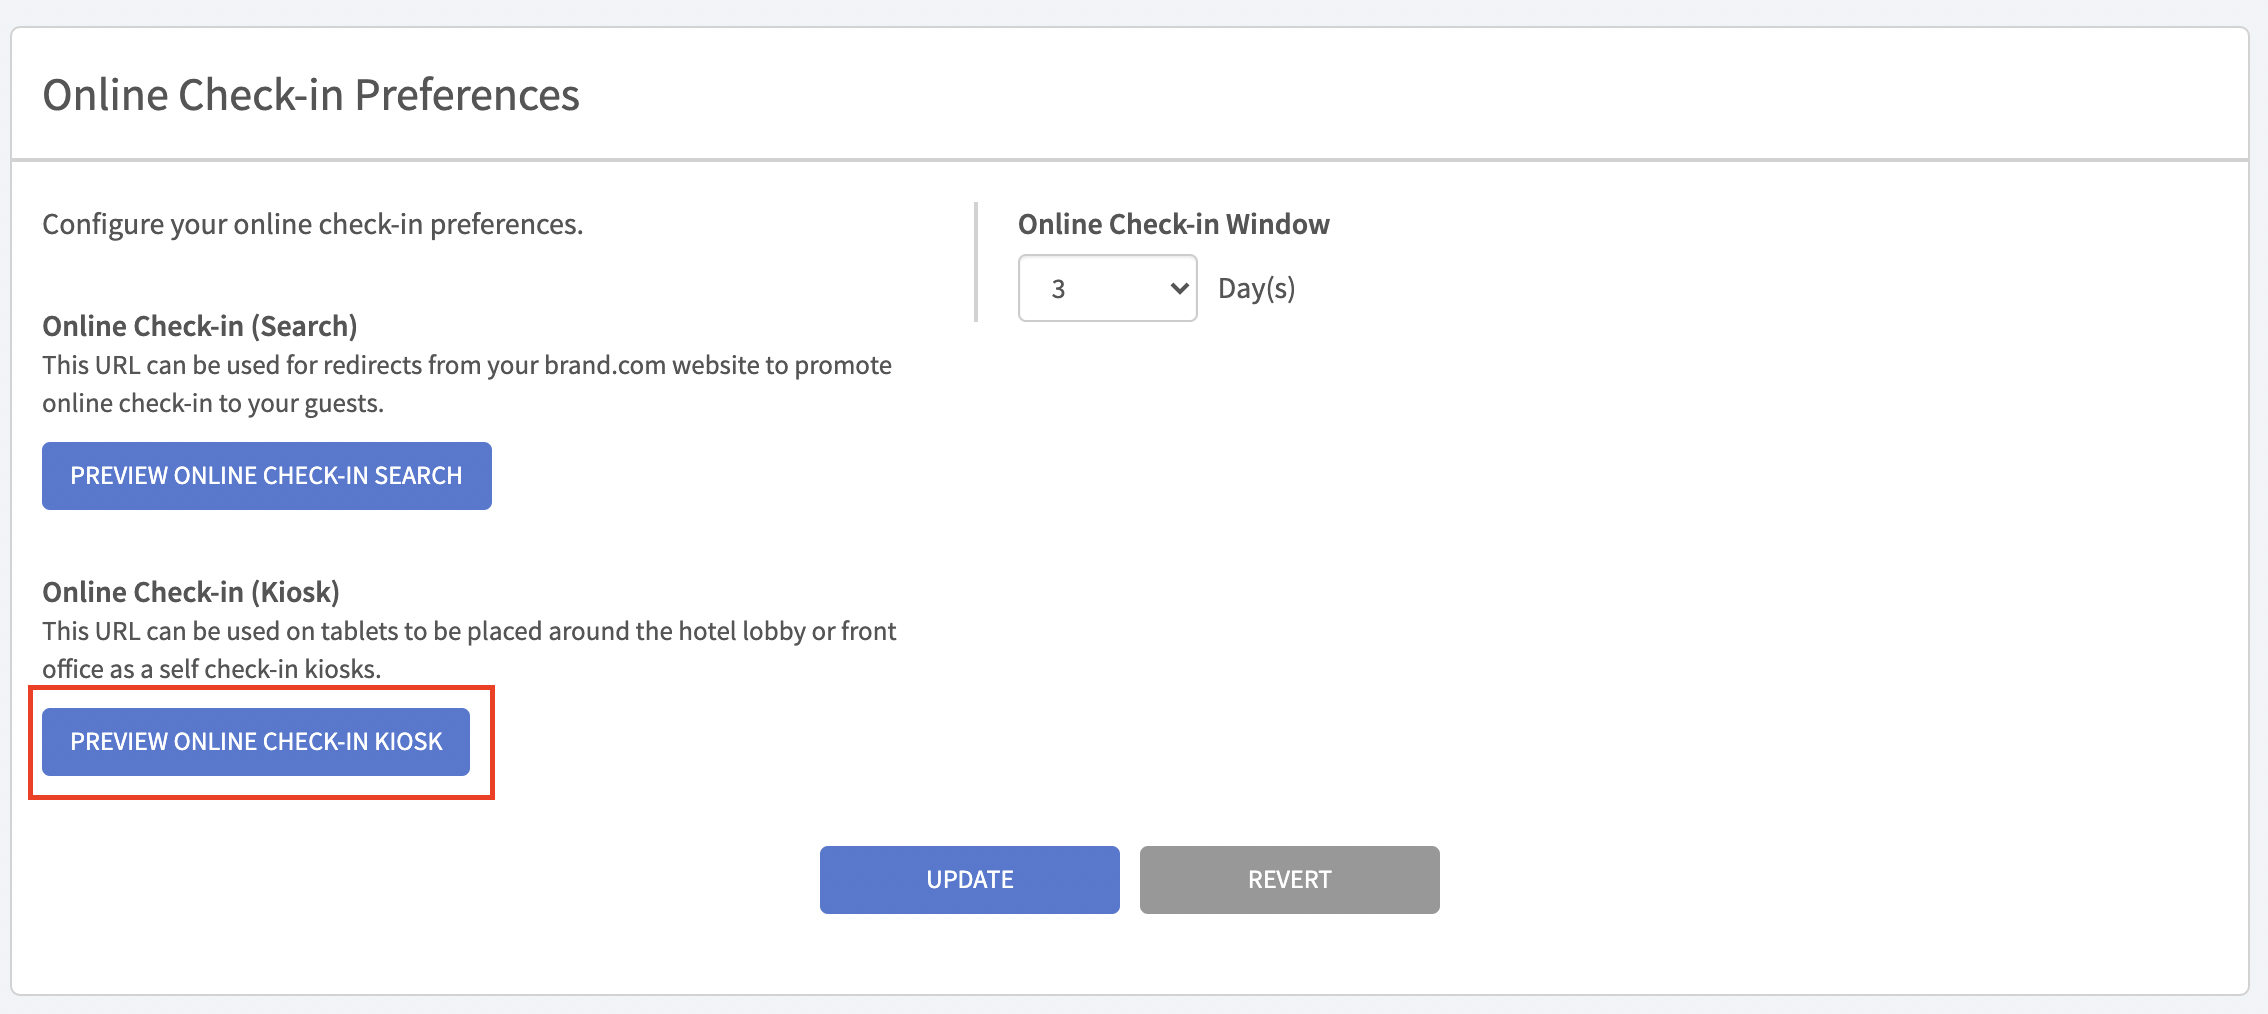
Click Preview Online Check-in Kiosk
Get the URL and set it as the browser default page on your Self Check-in Kiosk
KAI will open a new window, with a unique URL for the self-check-in. Save and Open the link on the tablet using for Self Check-in.
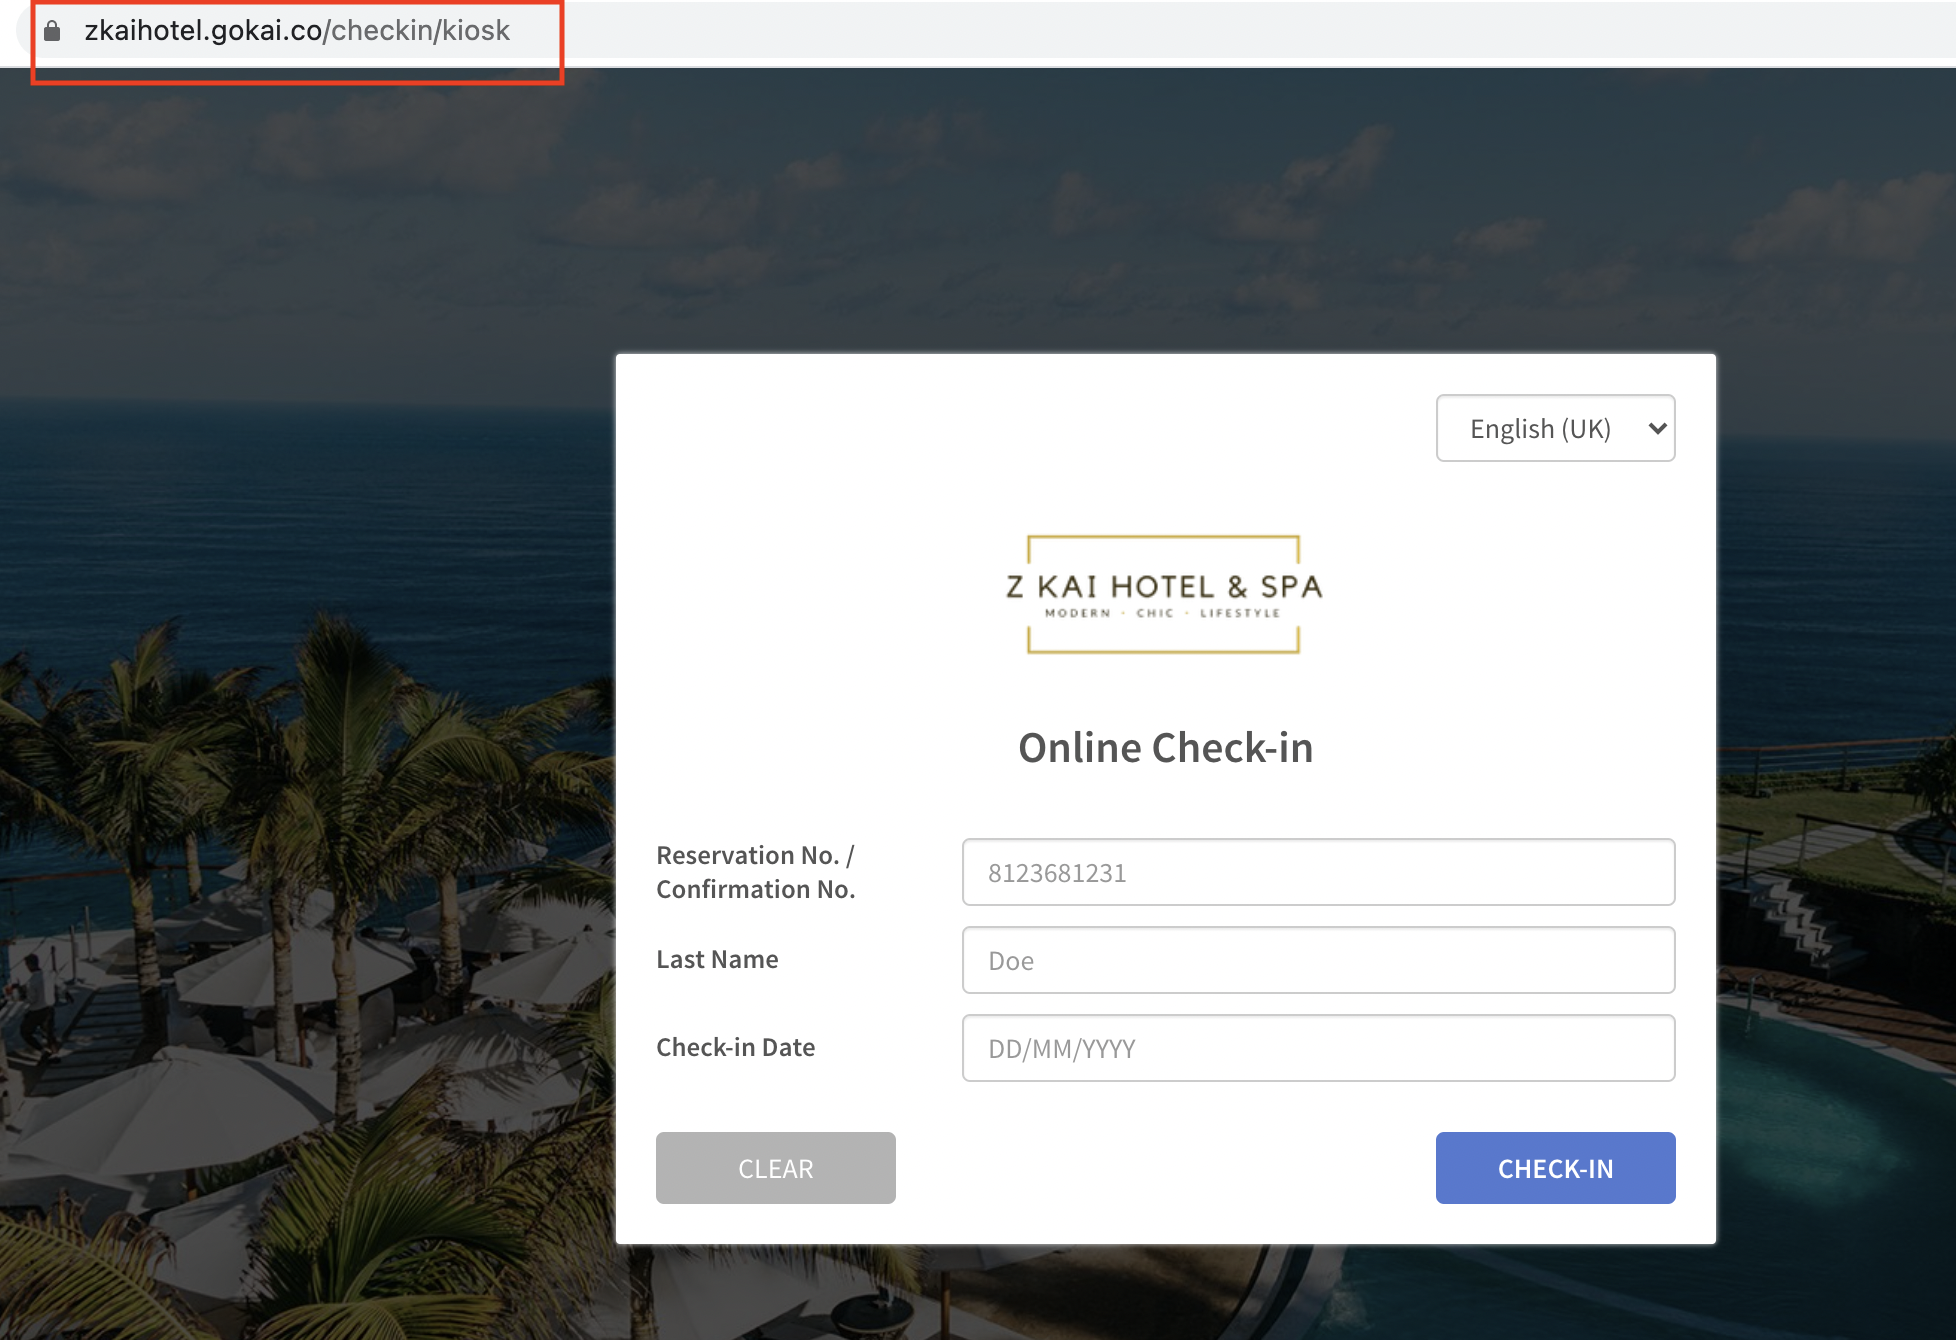
Proceed Check-in
Guests need to search the reservation by filling the correct “Reservation No.”, “Last Name” and “Check-in Date” to proceed check-in.
Once the guest submitted the Registration Form, they can pay the deposit and collect keycard at the front desk.
Important Notice:
If KAI only connects to your Channel Manager, the offline bookings have to be uploaded manually by the hotel before the guest can check-in for their reservations.
Click here to know how to upload offline bookings.